Azure Data Lake Analytics – Add Watermark to Image
In this post, I will show how to use custom Extractor, Processor, and Outputter.As an example, I will process image file by adding watermark.
At this moment I’m assuming you have Azure Data Lake account ready and Visual Studio configured to access Azure account. If not, please read this post:
http://remekh.blogspot.com/2016/08/azure-data-lake-analytics-process-web.html
Let’s start by creating new folder “images” under your Data Lake Store account and upload some jpg files to that folder.
Next, open Visual Studio and create new Azure Data Lake project.
Change name of usql script to ImageProcess.usql
Double click on ImageProcess.usql.cs
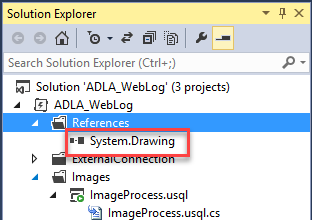
In your project add reference to System.Drawing.
To do this, follow these steps:
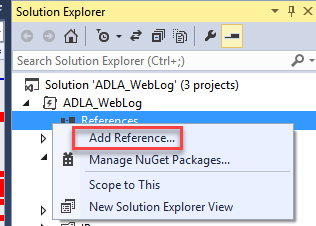
Right click on References and select “Add Reference”
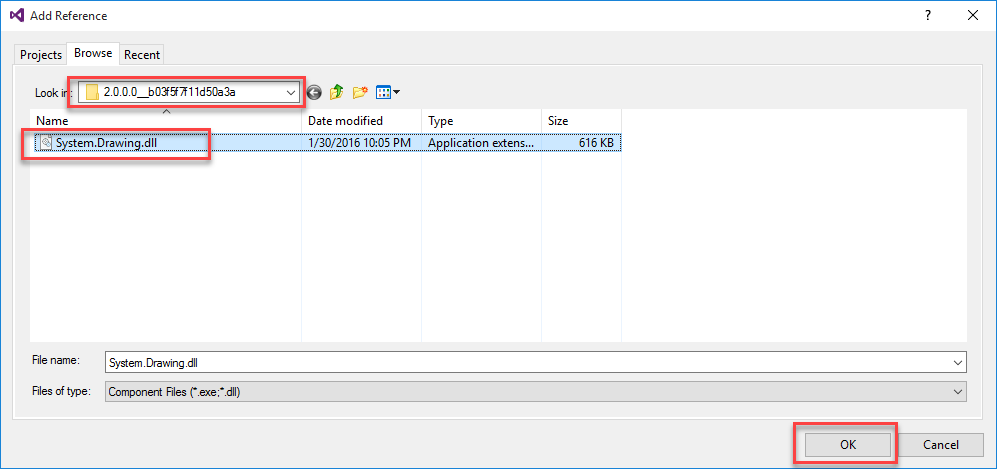
Switch to Browse tab and navigate to C:\Windows\assembly\GAC_MSIL\System.Drawing\2.0.0.0_b03f5f7f11d50a3a (or whatever version you have)
Select System.Drawing.dll and click "OK"
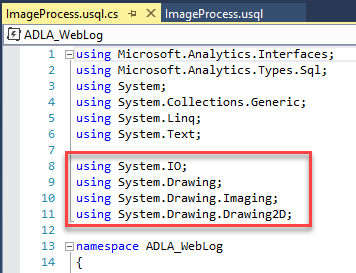
Add the following namespaces:
using System.IO;
using System.Drawing;
using System.Drawing.Imaging;
using System.Drawing.Drawing2D;
Extractor
When extractor reads binary file, it will read it as Stream but since U-SQL is not supporting Stream as the column type, we have to convert it to array of bytes (byte[])To do this, add the following class to .cs file:
   class ImageUtil
   {
       public static byte[] ConvertStreamToArray(Stream input)
       {
           try
           {
               var image = Image.FromStream(input);
               MemoryStream ms = new MemoryStream();
               image.Save(ms, System.Drawing.Imaging.ImageFormat.Jpeg);
               return ms.ToArray();
           }
           catch (Exception)
           {
               return null;
           }
       }
   }
This is our image utility class.Next, add custom Extractor class:
   [SqlUserDefinedExtractor(AtomicFileProcessing = true)]
   public class ImageExtractor : IExtractor
   {
       public override IEnumerable<IRow> Extract(IUnstructuredReaderinput, IUpdatableRow output)
       {
           byte[] imageArray = ImageUtil.ConvertStreamToArray(input.BaseStream);
           output.Set<byte[]>(0, imageArray);
           yield return output.AsReadOnly();
       }
   }
Our custom extractor will take the input stream and convert it to byte[]Processor
Next we will add custom Processor. This class will be responsible for adding watermark to our image.First, we need some class that is going to convert bytes’ array back to Stream.
Let’s add new class to our file:
   class ArrayToStream : IDisposable
   {
       private MemoryStream ms;
       public Image img;

       public ArrayToStream(byte[] inBytes)
       {
           ms = new MemoryStream(inBytes);
           img = null;
           try
           {
               img = Image.FromStream(ms);
           }
           finally
           {
               if (img == null)
               {
                   ms.Dispose();
               }
           }
       }

       public void Dispose()
       {
           try
           {
               img.Dispose();
           }
           finally
           {
               ms.Dispose();
           }
       }
   }

Next let’s add our custom Processor class:

   [SqlUserDefinedProcessor]
   public class ImageProcess : IProcessor
   {
       public override IRow Process(IRow input, IUpdatableRow output)
       {
           Stream img_output = new MemoryStream();

           byte[] image = input.Get<byte[]>(0);
           using (var si = new ArrayToStream(image))
           {
               Image img = si.img;

               Font font = new Font("Arial", 20, FontStyle.Bold, GraphicsUnit.Pixel);
               Color color = Color.FromArgb(100, 255, 0, 0);
               Point pt = new Point(10, 5);
               SolidBrush brush = new SolidBrush(color);

               Graphics graphics = Graphics.FromImage(img);
               graphics.DrawString("Your Watermark Text", font, brush, pt);
               graphics.Dispose();

               img.Save(img_output, ImageFormat.Jpeg);
               byte[] newImg = ImageUtil.ConvertStreamToArray(img_output);
               output.Set<byte[]>("image", newImg);
               return output.AsReadOnly();
           }
       }
   }
Change “Your Watermark Text” to any text you want to show on the image.Outputter
Lastly, let’s add custom Outputter class that will be responsible for converting our data from byte[] to image format.
   [SqlUserDefinedExtractor(AtomicFileProcessing = true)]
   public class ImageOutputter : IOutputter
   {
       public override void Output(IRow input, IUnstructuredWriter output)
       {
           var obj = input.Get<object>(0);
           byte[] imageArray = (byte[])obj;

           using (MemoryStream ms = new MemoryStream(imageArray))
           {
               var image = Image.FromStream(ms);
               image.Save(output.BaseStream, ImageFormat.Jpeg);
           }
       }
   }
U-SQL Script
Now, once we have all of our classes in place, let’s add U-SQL statements to process image.Double click on ImageProcess.usql Make sure that your script is set to correct Data Lake account.
Add the following code:
@Images =
   EXTRACT image byte[]
   FROM @"/images/someImageFile.jpg"
   USING new ADLA_WebLog.ImageExtractor();

@ProcessImage =
   PROCESS @Images
   PRODUCE image byte[]
   USING new ADLA_WebLog.ImageProcess();

OUTPUT @ProcessImage
TO @"/images/someNewImageFile.jpg"
USING new ADLA_WebLog.ImageOutputter();
Build and Submit your script.
When the job is finished, go to your Data Lake Storage and double click on “images” folder.
You should see the new file. Right click on the file and select "Download".
When done, open it – you should see your watermark on the image.
Hello! This post couldn’t be written any better! Reading this post reminds me of my previous room mate! He always kept chatting about this. I will forward this page to him. Fairly certain he will have a good read. Thank you for sharing!
ReplyDelete_____________________
Pentaho
Image Processing, also known as image analysis or image understanding, is a field of computer science that evolved out of the computer vision field in the mid-1970s. Computer image analysis is concerned with the automated analysis of digital images in order to extract information from the image, including information about people or objects pictured, and their respective environments.
ReplyDelete