Azure Data Lake Analytics - Process Web Logs Using U-SQL COMBINE
In this post I explain how to use Azure Data Lake Analytics to process IIS logs.
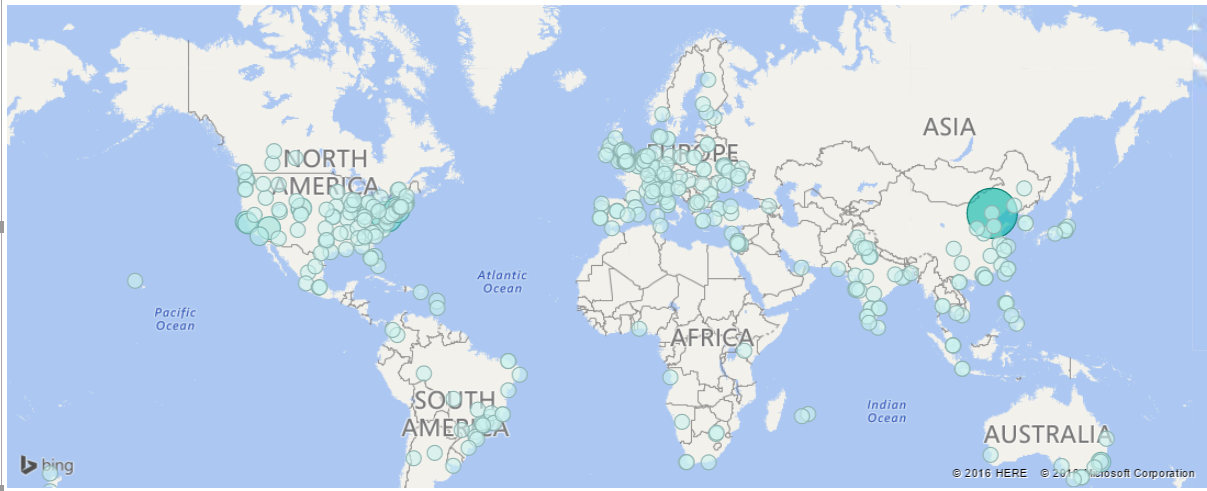
I will show you how to group visits per day and location and present results on the map in Power BI.
Requirements:
Azure subscription
Visual Studio 2013 or later
Azure Tools for Visual Studio -
https://azure.microsoft.com/en-us/tools/
Azure Data Lake Tools for Visual Studio -
https://www.microsoft.com/en-us/download/details.aspx?id=49504
Power BI account – optional
Create Azure Data Lake Analytics and Data Lake Store
If you already setup Azure Data Lake Analytics you can skip this step
To setup Data Lake, follow these steps:
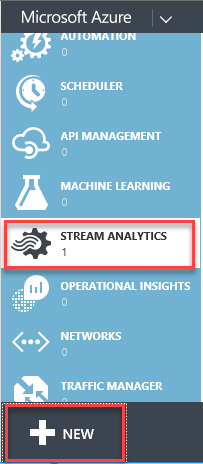
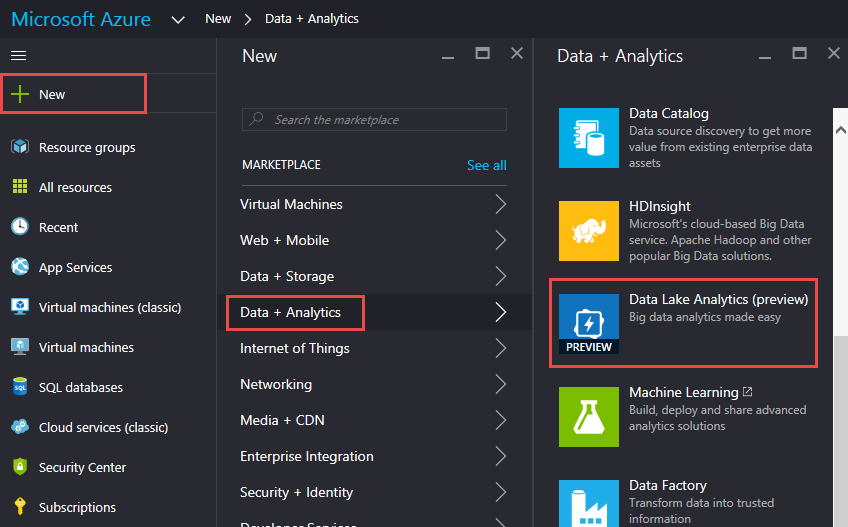
- Connect to https://portal.azure.com
- Click New => Data + Analytics => Data Lake Analytics
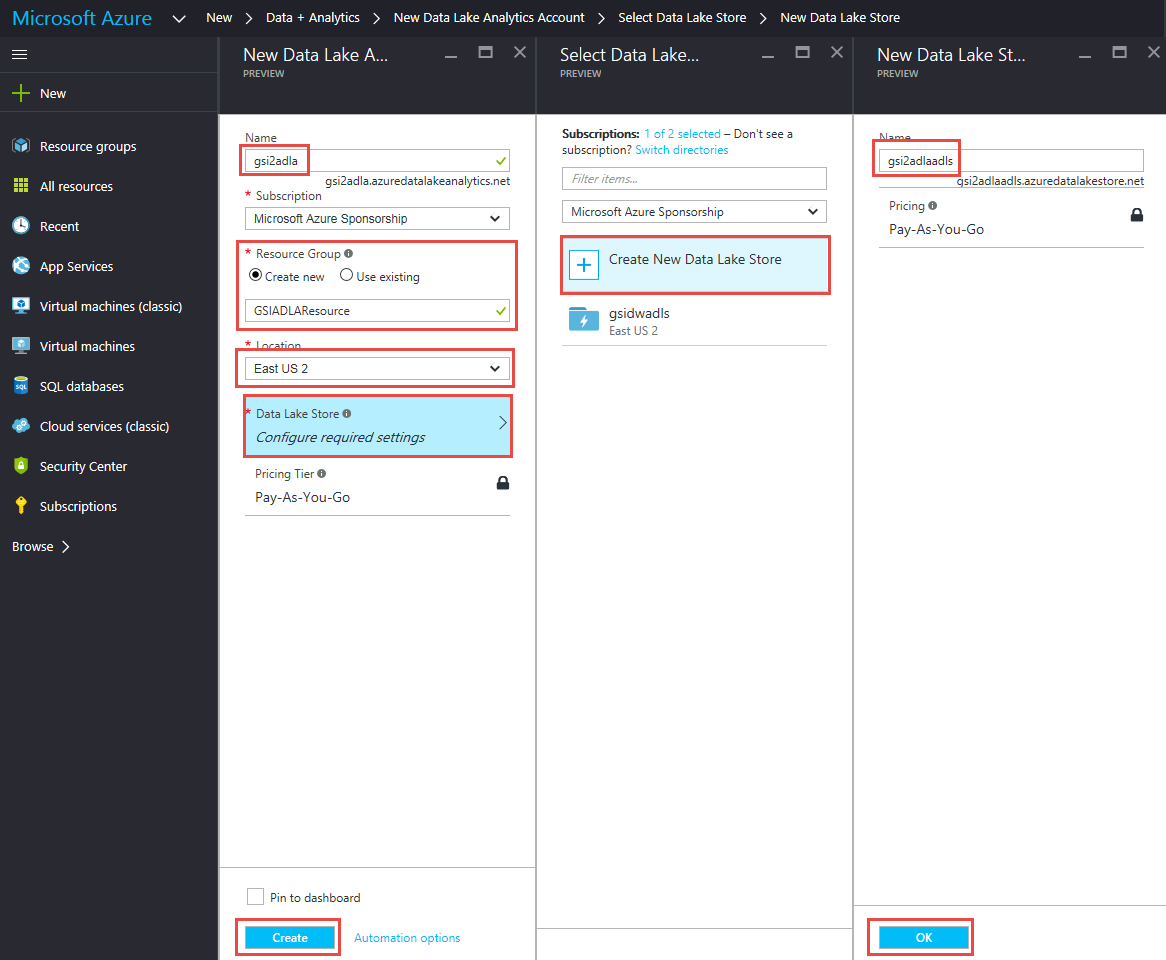
- Enter name and Resource group
- Select Location
- Click Data Lake Store
- Click Create New Data Lake Store
- Enter Name and Click OK
- Click Create
Wait until Data Lake Analytics becomes available.
Create Job to Process IIS Log Files
Setup Visual Studio
- Install Azure Tools for Visual Studio
- Install Azure Data Lake Tools for Visual Studio
- Open Visual Studio
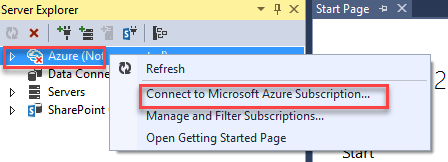
- Open Server Explorer
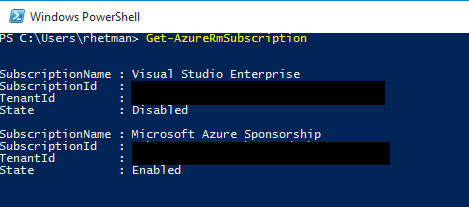
- Under Server Explorer right click and select “Connect to Microsoft Azure Subscription”
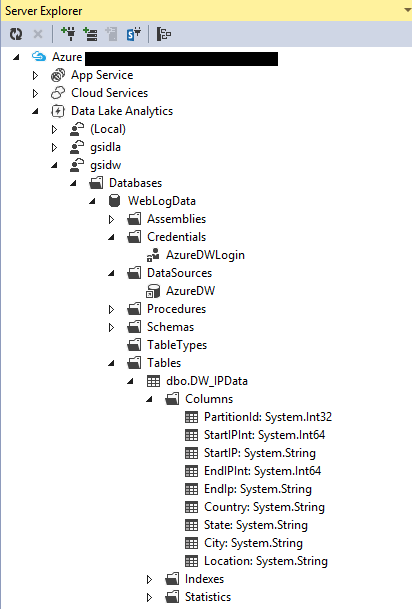
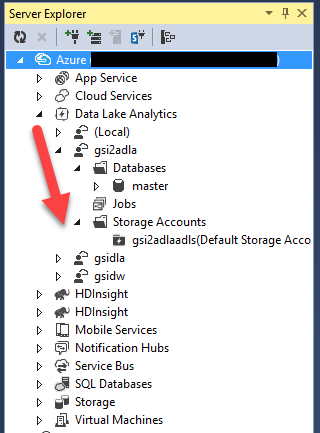
- After authentication expend Azure -> Data Lake Analytics -> [Name of the Data Lake you create in previous step]
Upload Logs to Data Lake Store
- Expend Storage Accounts
- Double click on Default Storage Account
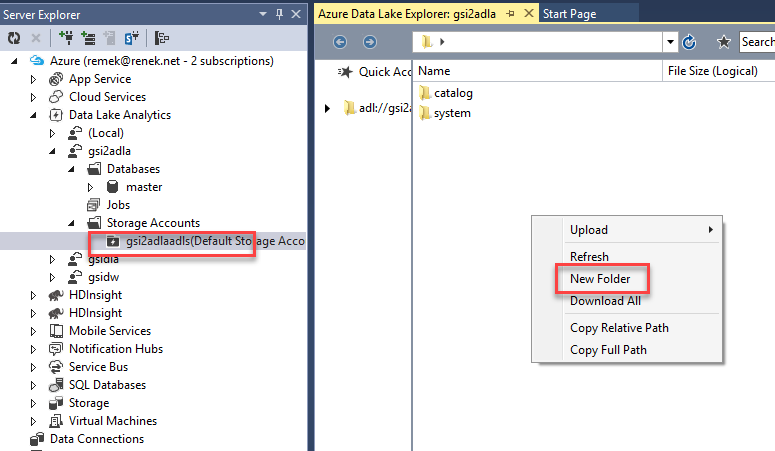
- You should see the list containers (folders)
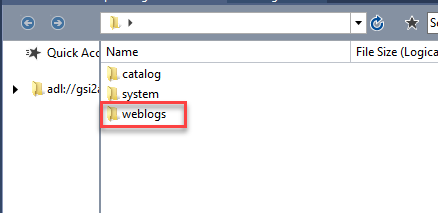
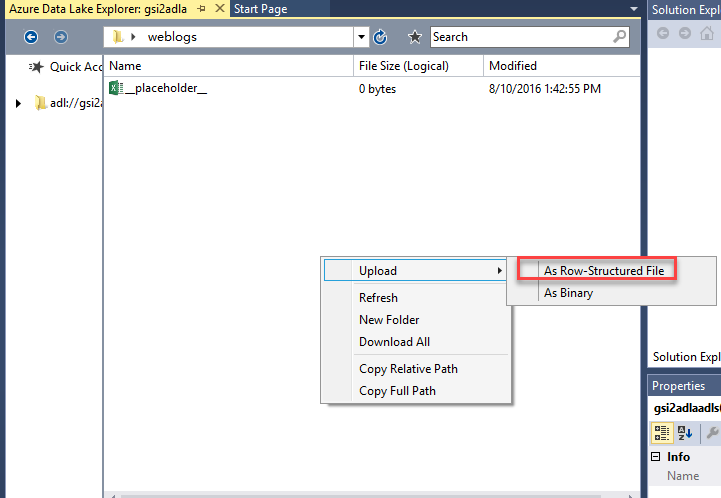
- Right click and select New Folder
- Double click on the new folder
- Right click and select Upload -> As Row-Structured File
There are some limitations as to how many files can be uploaded simultaneously. Because of this, you might repeat the last step few times until all log files are uploaded.
Upload IP Reference Data
- Under Storage Account create new folder ( e.g. ipdb)
- Download reference file from https://db-ip.com/db/download/city
- Extract csv file and upload to the new folder
Create Database and Tables
Create Database
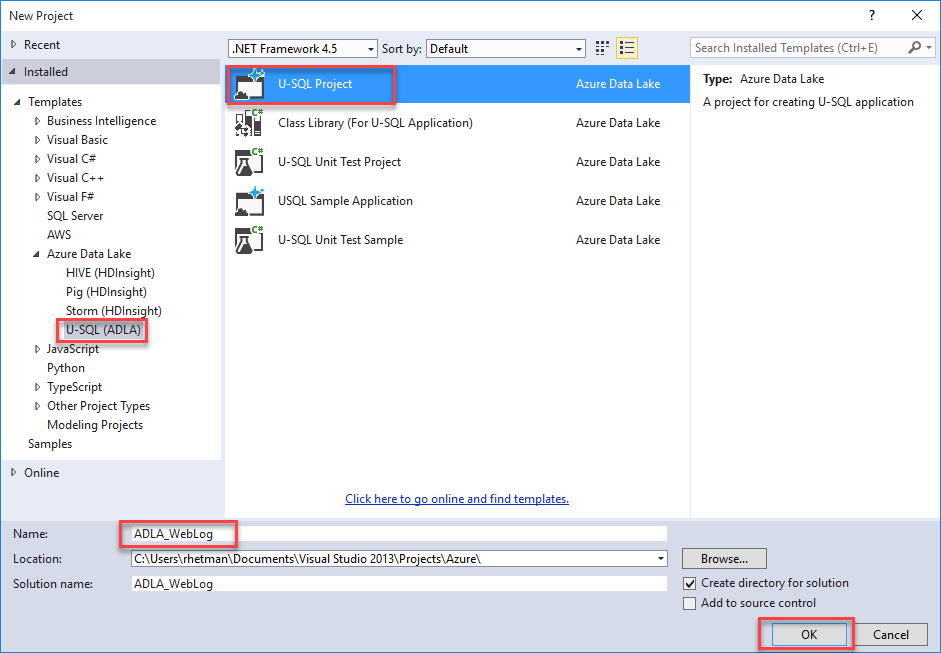
From the Visual Studio File menu select New -> Project
From Templates select Azure Data Lake -> U-SQL (ADLA)
Select U-SQL Project
Enter project name, location and click OK.
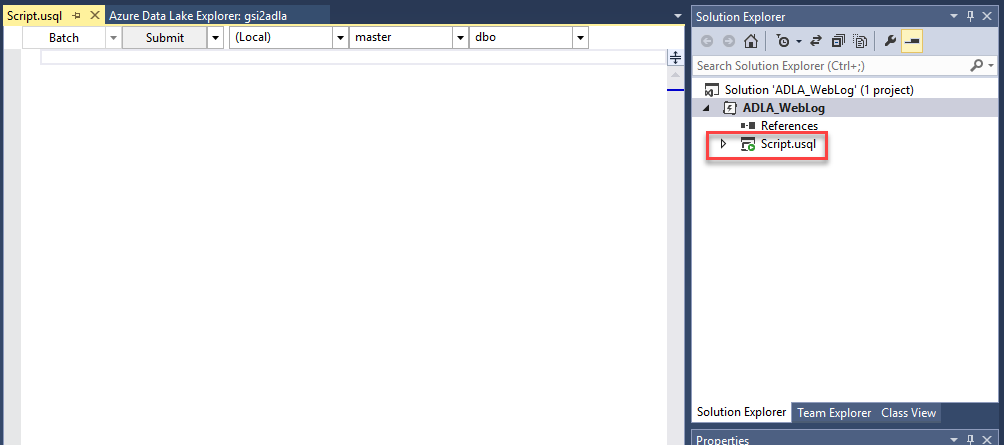
You should see new project with file Script.usql (you can rename this file e.g. CreateDatabse.usql)
Open that file
On the top you will see configuration options
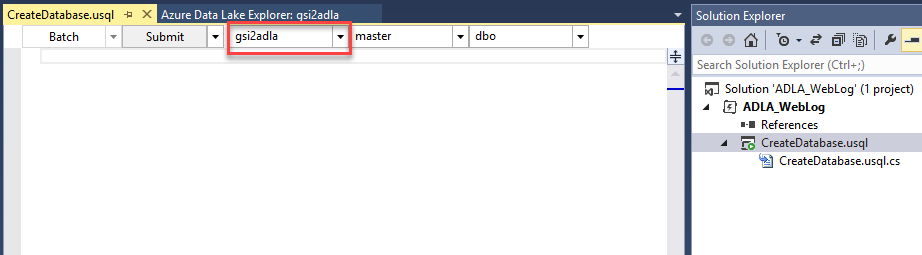
Change (local) to your Data Lake account
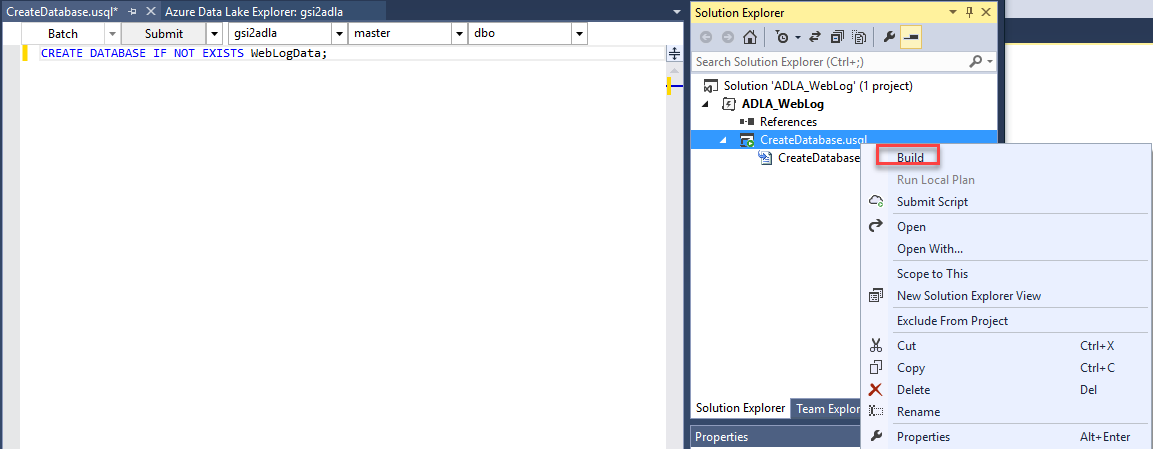
Type the following code:
CREATE DATABASE IF NOT EXISTS WebLogData;
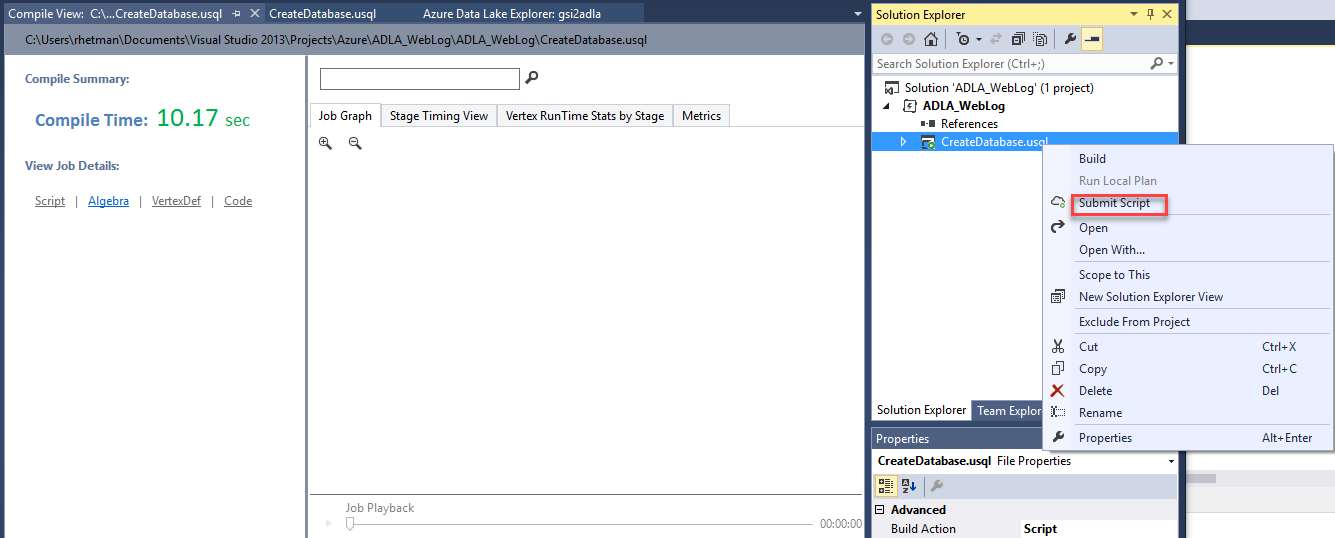
Right click on the script and select Build
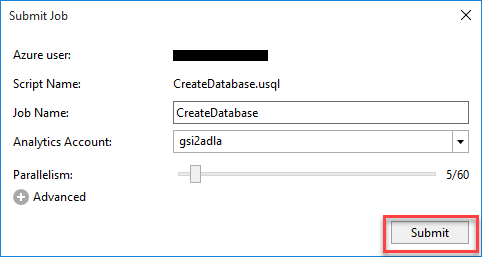
When done right click again and select Submit Script
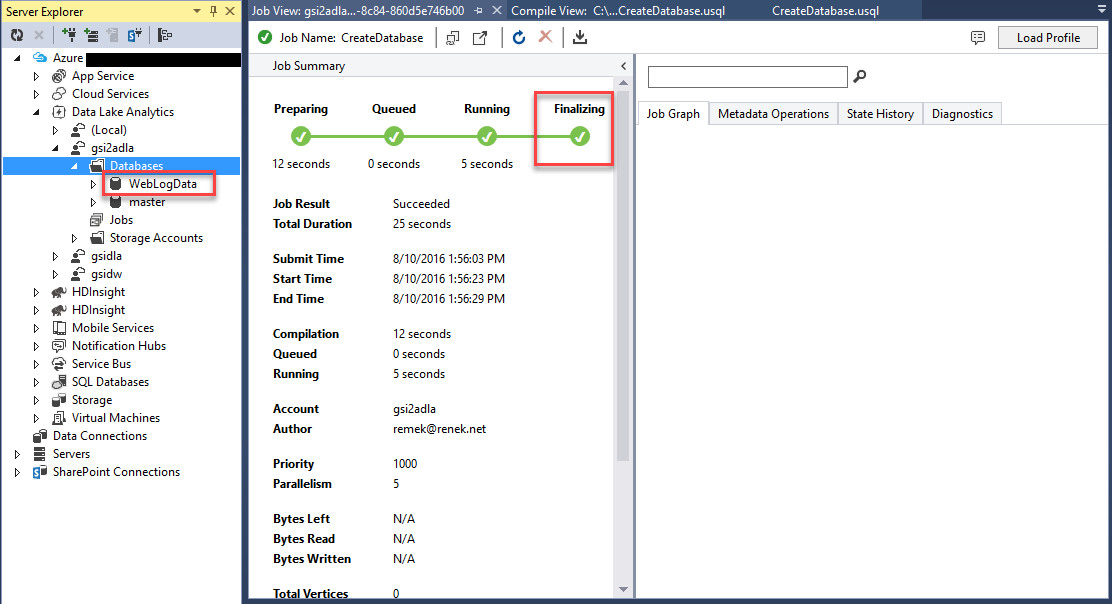
Wait until finished
Refresh Databases - you should see new one WebLogData;
Create Table to Store Log Data
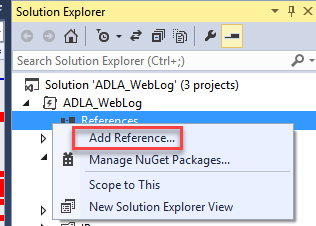
Add new usql script to project. You can do it by right click on the project and selecting Add -> New Item
Change name to LogExtractorFunction.usql
In the script option change (local) to your Data Lake Account and database from master to WebLogData (or the name of database that you created in previous step).
Type the following code:
DROP FUNCTION IF EXISTS WebLogData.dbo.GetLogFiles;

CREATE FUNCTION WebLogData.dbo.GetLogFiles ()
RETURNS @result TABLE
(
    s_date DateTime,
    s_time string,
    s_sitename string,
    cs_method string,
    cs_uristem string,
    cs_uriquery string,
    s_port int,
    cs_username string,
    c_ip string,
    cs_useragent string,
    cs_referer string,
    sc_status int,
    sc_substatus int,
    sc_win32status int,
    s_timetaken int
)
AS
BEGIN
    @result = EXTRACT
        s_date DateTime,
        s_time string,
        s_sitename string,
        cs_method string,
        cs_uristem string,
        cs_uriquery string,
        s_port int,
        cs_username string,
        c_ip string,
        cs_useragent string,
        cs_referer string,
        sc_status int,
        sc_substatus int,
        sc_win32status int,
        s_timetaken int
    FROM @"/weblog/{*}.log"
    USING Extractors.Text(delimiter:' ',silent:true);
    RETURN;
END;
This code will create table-valued function that will extract and return all records from all log files.
/
weblog/ is the name of the folder where log files were uploaded
Build and submit script
Add new script UploadLogData.usql
Change option to correct account and database
Type the following code:
DROP TABLE IF EXISTS WebLogData.dbo.WebLogs;

CREATE TABLE WebLogData.dbo.WebLogs (
            Year        int,
            Month       int,
            Day         int,
            IPInt    long,
            IPPartition int,
            TotalVisits         long?,
            INDEX lmv_idx CLUSTERED (IPInt ASC)
                  DISTRIBUTED BY RANGE (IPInt) INTO 255
);

@weblog = WebLogData.dbo.GetLogFiles ();

INSERT INTO WebLogData.dbo.WebLogs
SELECT s_date.Year AS Year,
       s_date.Month AS Month,
       s_date.Day AS Day,
       ADLA_WebLog.Convertor.GetIP(c_ip) AS IPInt,
       ADLA_WebLog.Convertor.GetPartitionID(c_ip) AS IPPartition,
       COUNT(DISTINCT c_ip) AS cnt
FROM @weblog
GROUP BY s_date,
         c_ip;
The first statement will create new table to store log data.
The next one will execute GetLogFiles function and store results in rowset expression variable
The last one will take all records from @weblog variable, group it by date and user IP address, and insert result into WebLogs table.
If you took a peek at the data format from IP reference file, you have probably noticed that each location has assigned range of IPs (from – to). Because of this and because IPs from log files as well as IPs from reference file are in string format, we have to come up with some kind of conversion of IPs.
In this example I’m going to convert each IP to number so the minimum IP will be 0 and maximum will be 255255255255
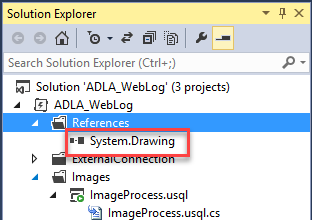
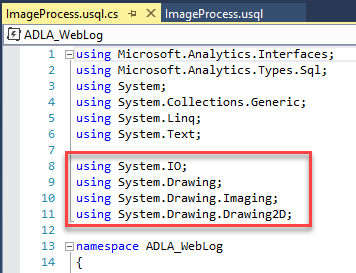
To implement conversion method, expend your usql script and double click on .cs file
Below namespace enter following code:
    public static class Convertor
    {
        public static long GetIP(string ip)
        {
            try
            {
                var p = ip.Replace("\"", "").Split('.');
                return long.Parse(p[0]+"000000000")  + long.Parse(p[1]+"000000")
+ long.Parse(p[2]+"000") + long.Parse(p[3]);
}
catch
{
return 0;
}
}
public static int GetPartitionID(string ip)
{
try
{
var p = ip.Replace("\"", "").Split('.');
return int.Parse(p[0]);
}
catch
{
return 0;
}
}
}
In U-SQL you can reference methods using the following schema: [namespace].[class name].[method name](parameters)
Here is how we reference those methods in our script:
ADLA_WebLog.Convertor.GetIP(c_ip) AS IPInt,
ADLA_WebLog.Convertor.GetPartitionID(c_ip) AS IPPartition,
Build, and if no error occurs, Submit Script and Wait until job is finished. When done, you should see the new table in database.
Create Table to Store IP Reference Data
In this step, we will create table to store IP reference location data.
Add new script IPReferenceFunction.usql to project
Type the following code:
DROP FUNCTION IF EXISTS WebLogData.dbo.ProcessIPs;

CREATE FUNCTION WebLogData.dbo.ProcessIPs()
RETURNS @result TABLE
(
    ip_start string,
    ip_end string,
    country string,
    state string,
    city string
)
AS
BEGIN
    @result = EXTRACT
    ip_start string,
    ip_end string,
    country string,
    state string,
    city string
    FROM @"/ipdb/dbip-city.csv"
    USING Extractors.Csv(silent:true);
    RETURN;
END;
Build and Submit Script
Add new script UploadIP.usql and add the following code:
DROP TABLE IF EXISTS WebLogData.dbo.IPs;

CREATE TABLE WebLogData.dbo.IPs (
            ip_start    string,
            ip_end      string,
            country     string,
            state       string,
            city        string,
            ip_start_int long,
            ip_end_int long,
            partitionid int,
    INDEX idx_ip
    CLUSTERED(ip_start_int ASC, ip_end_int ASC)
                  DISTRIBUTED BY RANGE (partitionid) INTO 255
);

@ipdata = WebLogData.dbo.ProcessIPs();

INSERT INTO WebLogData.dbo.IPs SELECT ip_start,
       ip_end,
       country,
       state,
       city,
       ADLA_WebLog.Convertor.GetIP(ip_start) AS ip_start_int,
       ADLA_WebLog.Convertor.GetIP(ip_end) AS ip_end_int,
       ADLA_WebLog.Convertor.GetPartitionID(ip_start) AS partitionid
FROM @ipdata WHERE ip_start NOT LIKE "%:%";
Open .cs file and add the following code. It is the same class and method we used before to convert IPs.
    public static class Convertor
    {
        public static long GetIP(string ip)
        {
            try
            {
                var p = ip.Replace("\"", "").Split('.');
                return long.Parse(p[0] + "000000000") + long.Parse(p[1]
+ "000000") + long.Parse(p[2] + "000") + long.Parse(p[3]);
}
catch
{
return 0;
}
}
public static int GetPartitionID(string ip)
{
try
{
var p = ip.Replace("\"", "").Split('.');
return int.Parse(p[0]);
}
catch
{
return 0;
}
}
}
Build and Submit Script
Wait until job is finished. When done, you should see the second table in database.
Create Table for Summary Data
Now, we need a table where we are going to store result of our computations.
To create a new table, add new script “VisitsSummaryTabel.usql” to project and type the following code:
DROP TABLE IF EXISTS WebLogData.dbo.VisitSummary;

CREATE TABLE WebLogData.dbo.VisitSummary (
    Year int,
    Month int,
    Day int,
    Location     string,
    TotalVisits long?,
    INDEX idx_lmdDW
    CLUSTERED(Year ASC)
    DISTRIBUTED BY RANGE (Year) INTO 50
  );
Process Data
In this paragraph I will show how to merge log data with IP reference data and store it in the VisitSummary table.
There are few methods to achieve this goal. I would recommend the last one since it has the best performance.
Merge Data Using CROSS JOIN
In this example, I will use CROSS APPLY to reference user IP to Location.
Let's add new script CrossApplyMethod.usql to our project and type the following code:
  @data =
           SELECT Year, Month, Day, IPInt, TotalVisits
           FROM WebLogData.dbo.WebLogs
           WHERE IPInt > 0;

INSERT INTO WebLogData.dbo.VisitSummary
SELECT D.Year,
       D.Month,
       D.Day,
       (String.IsNullOrEmpty(I.state) ? I.city+", "+I.country : I.city+",    "+I.state+", "+I.country) AS Locaton,
      D.TotalVisits
FROM @data  AS D
     CROSS JOIN
         WebLogData.dbo.IPs AS I
WHERE r.IPInt BETWEEN I.ip_start_int AND I.ip_end_int;
Since not all locations have State value, we need to apply some logic to return correct value.
Unlike in T-SQL where you would use CASE statement to write this logic, in U-SQL we are using C#
If you wonder why CROSS JOIN instead of LEFT JOIN, here is the answer:
From MSDN “U-SQL, like most scaled out Big Data Query languages that support joins, restricts the join comparison to equality comparisons between columns in the rowsets to be joined. If the column references are not unique across all the rowsets in the query, they have to be fully qualified with the rowset variable name, rowset name or specified alias.”
To read more about U-SQL JOIN visit:
https://msdn.microsoft.com/en-us/library/azure/mt621310.aspx
Using this method, it took 25 minutes to process my files.
Merge Data Using Partition
As you recall both tables (WebLogs and IPs) we added column to store partition Id.
We used ADLA_WebLog.Convertor.GetPartitionID(IP) method to get partition Id.
The partition is integer that represent first part of the IP address:
“A.B.C.D” => Partition Id = Integer(A)
Let's create new script PartitionMethod.usql and type the following code:
INSERT INTO WebLogData.dbo.VisitSummary
SELECT V.Year, V.Month, V.Day,
      (String.IsNullOrEmpty(I.state) ? I.city+", "+I.country : I.city+", "+I.state+", "+I.country) AS Locaton,
       V.TotalVisits
FROM WebLogData.dbo.WebLogs AS V LEFT JOIN WebLogData.dbo.IPs AS I
      ON V.IPPartition == I.partitionid
WHERE V.IPInt > 0 AND V.IPInt >= I.ip_start_int AND V.IPInt <= I.ip_end_int;
In this case, we can use LEFT JOIN because both tables can be joined by partition Id.
Because in the IPs (our reference table) multiple records can have the same partition, we have to use WHERE clause to find correct location.
Using this method, it took 8.5 minutes to process the same data comparing to previous method.
Merge Data Using COMBINE
In this method we are going to use COMBINE U-SQL expression.
Let’s start by adding new script CombineMethod.usql and typing the following code:
@data =
           SELECT Year, Month, Day, IPInt, TotalVisits, IPPartition
           FROM WebLogData.dbo.WebLogs
           WHERE IPInt > 0;

@ip = SELECT ip_start_int, ip_end_int, country, state, city, partitionid FROM WebLogData.dbo.IPs;

@c =
    COMBINE @data WITH @ip
    ON IPPartition == partitionid
    PRODUCE Year int,
            Month int,
            Day int,
            Location string,
            TotalVisits long?
    USING new ADLA_WebLog.MergeData();

INSERT INTO WebLogData.dbo.VisitSummary
SELECT Year,
       Month,
       Day,
       Location,
       TotalVisits
FROM @c;
Open .cs file and add following code:
    [SqlUserDefinedCombiner]
    public class MergeData : ICombiner
    {
        public override IEnumerable<IRow> Combine(IRowset left, IRowset right, IUpdatableRow output)
        {
            var ipList = (from ip in right.Rows
                          select new
                          {
                              IPStart = ip.Get<long>("ip_start_int"),
                              IPEnd = ip.Get<long>("ip_end_int"),
                              country = ip.Get<string>("country"),
                              state = ip.Get<string>("state"),
                              city = ip.Get<string>("city")
                          }).ToList();

            foreach(var row in left.Rows)
            {
                output.Set<int>("Year", row.Get<int>("Year"));
                output.Set<int>("Month", row.Get<int>("Month"));
                output.Set<int>("Day", row.Get<int>("Day"));
                output.Set<long?>("TotalVisits", row.Get<long?>("TotalVisits"));
                long IP = row.Get<long>("IPInt");

                string Location = "";

                if (ipList != null)
                {
                    var loc = (from w in ipList
                               where IP >= w.IPStart && IP <= w.IPEnd
                               select new
                               {
                                   country = w.country,
                                   state = w.state,
                                   city = w.city
                               }).ToList();

                    if ((loc != null) && (loc.Count > 0))
                    {
                        if (String.IsNullOrEmpty(loc[0].state))
                        {
                            Location = String.Format("{0}, {1}", loc[0].city, loc[0].country);
                        }
                        else
                        {
                            Location = String.Format("{0}, {1}, {2}", loc[0].city, loc[0].state, loc[0].country);
                        }
                    }
                };

                output.Set<string>("Location", Location);
                yield return output.AsReadOnly();
            }
        }
    }
Build and Submit Script
How this works:
First, log data records and IP reference records assigned to variable rowsets.
Next, in the COMBINE statement, take both rowsets, join them using partition id and pass to custom combiner.
Because the UDO’s IRowset is implemented as a forward-only streaming API, that does not support accessing a row again after accessing the next row, the first step in custom combiner is to convert IP Reference rowset to the list.
Next it will iterate through all log records. For each record it will take user IP and try to find location in reference data.
Finally, it will output data to new schema that was defined in the COMBINE statement.
This method took only 5 minutes to process the same amount of data.
Present Result in Power BI
Output data
At the time of writing this article, Power BI provides connection only to Data Lake Store (not database directly).
To output data from table to store, follow these steps:
Under Storage Account, create new folder “outputs”
Add new script (OutputData.usql) to project and add the following code:
@rs1 =
    SELECT *
    FROM WebLogData.dbo.VisitSummary;

OUTPUT @rs1
    TO "/outputs/log_data.csv"
    USING Outputters.Csv();
Build and Submit Script
When done, you should see log_data.csv file in outputs folder.
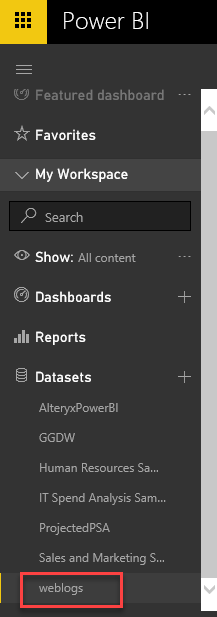
Power BI
Open Power BI Desktop. You can download it from:
https://powerbi.microsoft.com/en-us/desktop/
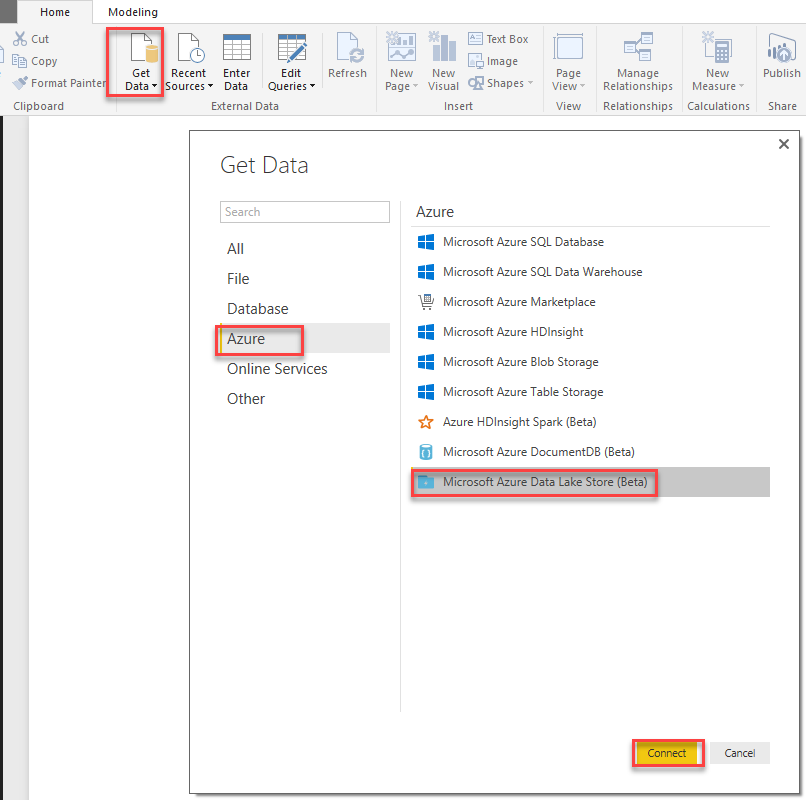
Click, "Get Data"
From the list on the left side, select Azure and from the right select Microsoft Azure Data Lake Store
Click "Connect"
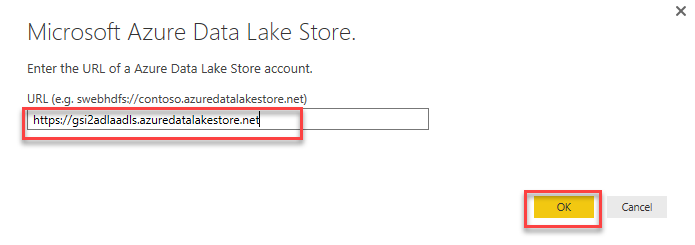
Enter URL to Data Lake Store – you can get it from Azure portal – it will look like this: https://xxxxx.azuredatalakestore.net where xxxxx is your Data Lake Store account name.
Click "OK"
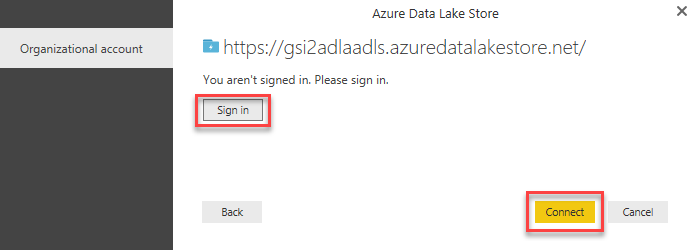
If you are not signed in to Azure, click Sign In and then click Connect.
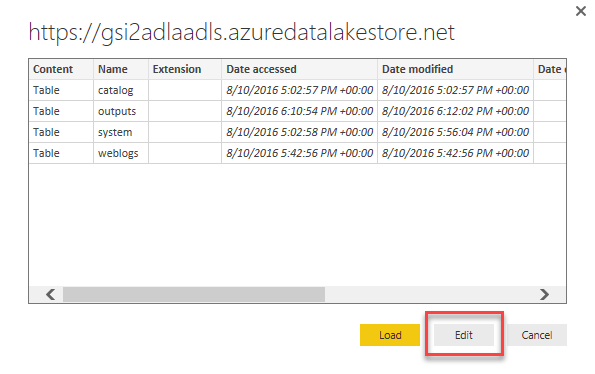
You should see the table with list of folders created under your Data Lake Store account.
Click "Edit"
Click the first column (Table) in the row with outputs folder
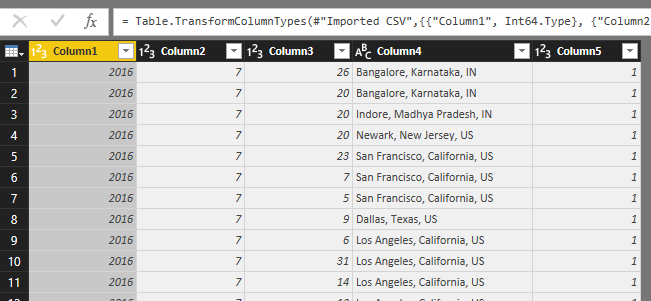
Click the first column (Binary) in the row with your data file. If you follow these examples, it should be log_data.csv
Rename columns as follow:
Column1 -> Year
Column2 -> Month
Column3 -> Day
Column4 ->Location
Column5 ->TotalVisits
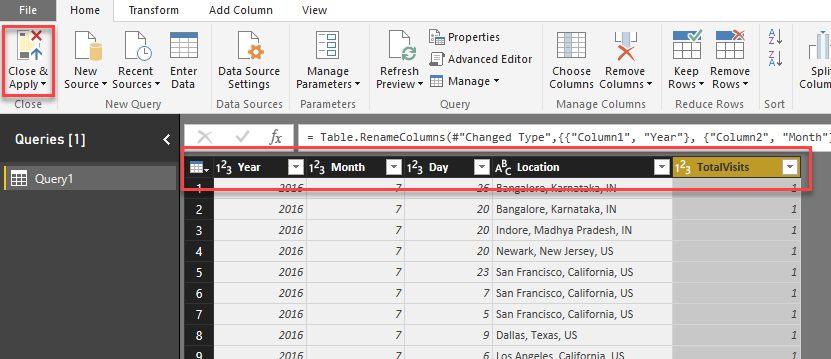
Click Close & Apply
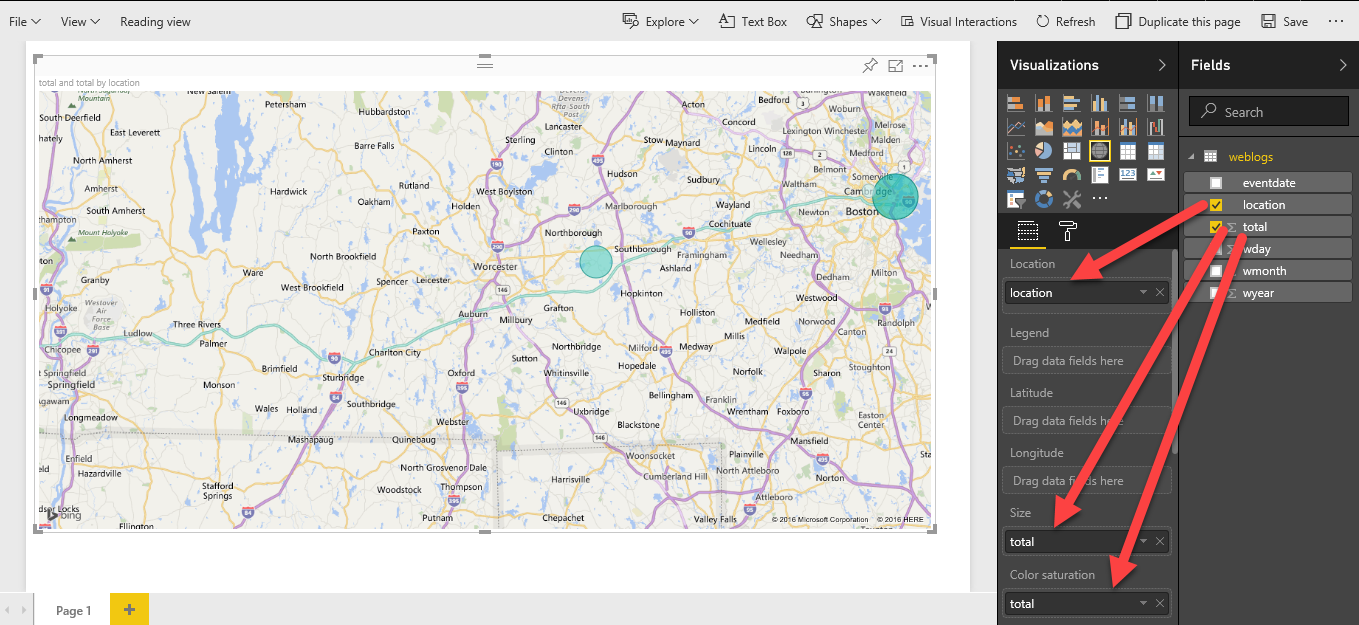
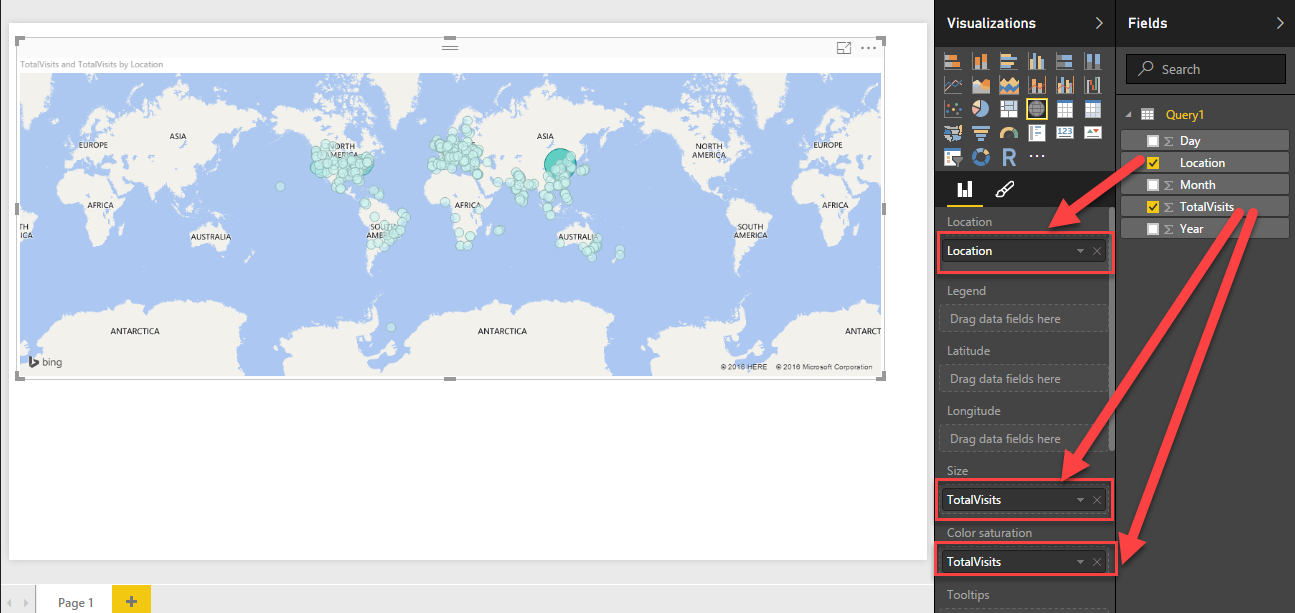
From the Visualization on the left side, click Map to add it to report.
In the Map properties make the following changes:
From the query drag Location column and drop on Location Map property,
Drag TotalVisits and drop on Size
Drag TotalVisits once again and drop it on Color saturation
Done. Your report "Visit by Country" is ready to publish to Power BI